Page History
...
- Login to ARE: https://are.nci.org.au/
- Click the Virtual Desktop or Virtual Desktop (GPU) icon on the Dashboard (home page)
- The settings form allows you to:
- specify the (maximum) number of hours you want to run your session
- select which compute queue you want to run on (suggested common queues are in the dropdown, or you can enter any queue you like as text)
- set the (maximum) virtual compute size.
- select which project to allocate the SU from (must be a project with a current allocation, or the session will not start). You can select from the drop-down or simply type it in the field
- select what storage (gdata and scratch areas) are required for your job to run. You can select from the drop-down, the quick links below the field or simply type them in the field
- select software licenses if required. You can select from the drop-down, the quick links below the field or simply type them in the field
- receive a notification email once your session is ready. You don't have to select this but it may be useful if the cluster is very busy and your session has to be queued waiting for a free slot
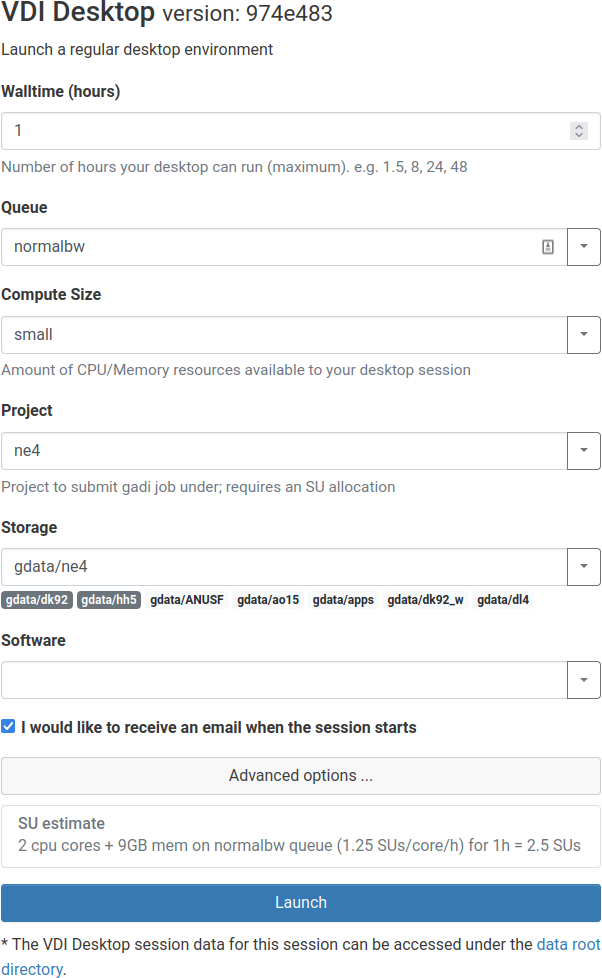
- If needed, you can click the 'Advanced options ...' button to reveal additional fields, where you can
- define additional environment variables
- set the jobsfs size
- add any further PBS flags not covered by other options
- provide a path to a Pre-script to be run before the session starts
- set the screen resolution of your VNC session. Note: this only applies if you use the Native VNC application to connect OR the GPU enabled Virtual Desktop; using web-based VNC automatically sizes to fit your browser on the regular Virtual Desktop

...
Overview
Content Tools