Page History
| Info | ||
|---|---|---|
| ||
This page needs updates to all sections |
Under OODUnder ARE, the JupyterLab App allows you to start a dedicated JupyterLab instance dedicated for your use.
| Table of Contents |
|---|
Starting a Session
- Login to OODARE: https://oodare.nci.org.au/
- Click the JupyterLab icon on the Dashboard (home page)
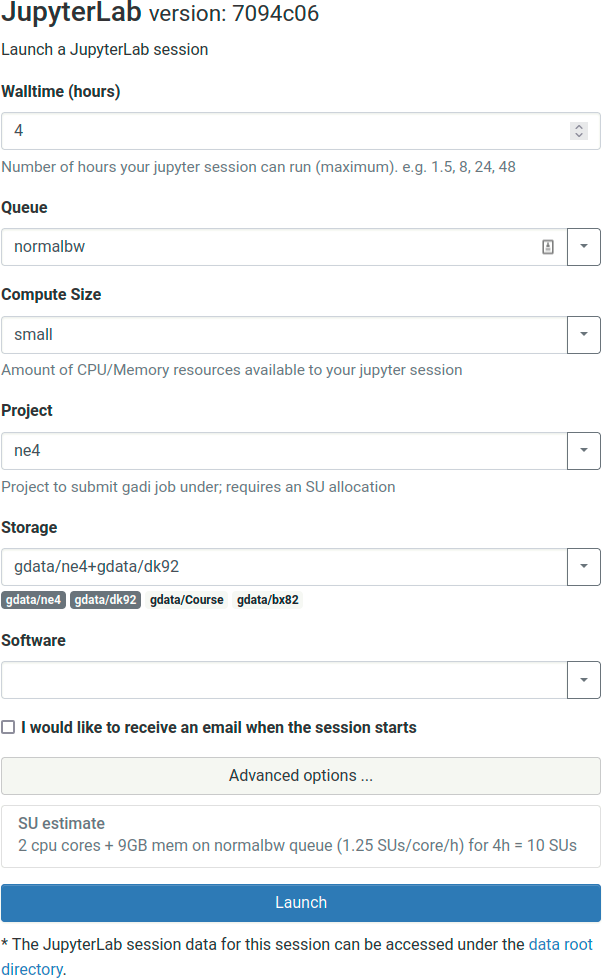
- Choose:
- the number of hours you want your session to run for (maximum)
- the compute queue you want to submit the job to
- the size of the compute resources you have access to (maximum). If you attempt to exceed the CPU limit your processes will be throttled to the amount requested. If you exceed the memory your Jupyter Kernel may be terminated. Note: this is the resources used within the notebook; if you offload the processing to other jobs (e.g. using Dask) then you may not need a very large JupyterLab session
- select which project to allocate the SU from (must be a project with a current allocation, or the session will not start)
- select what storage (gdata and scratch areas) are required for your job to run
- select additional software licenses if required for your job
- if you want to receive an email once your session has started. This is useful when the cluster is busy and your session is queued waiting for a free slot
- Optionally use the advanced options to specify an alternative JupyterLab installation or other module files that your notebooks use
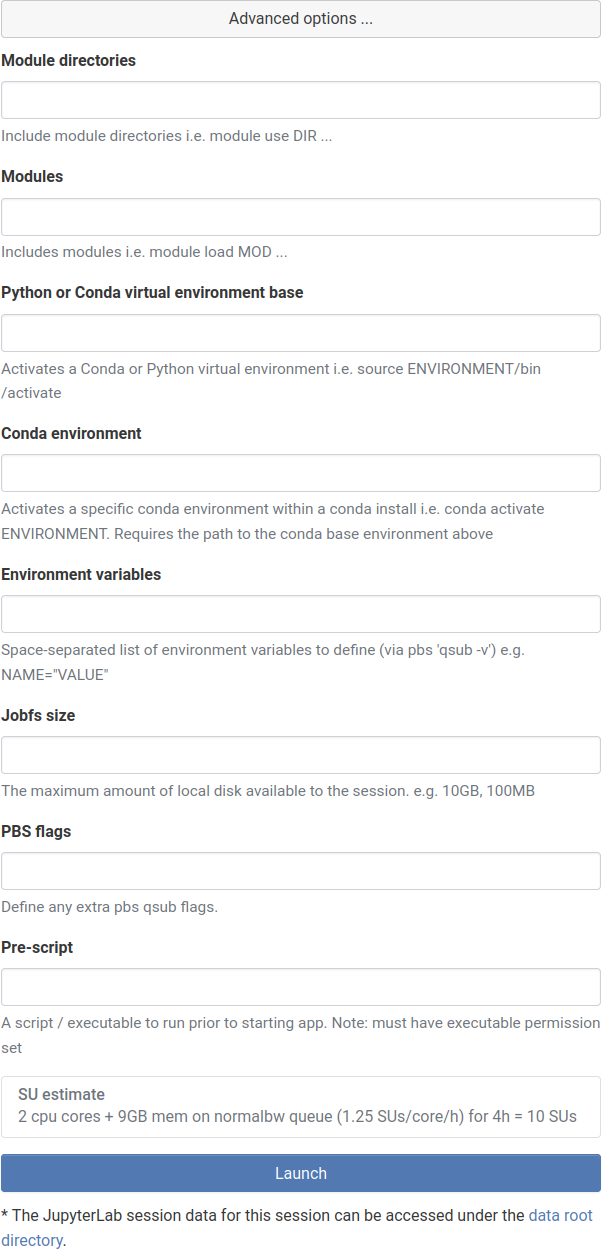
- Choose:
- Module directories: a space-separated list of additional directories to search for modulefile definitions. If these are under /g/data or /scratch make sure you've included the appropriate directive(s) in your storage options above.
- Modules: a space-separated list of modules to be loaded
- Python or Conda virtual environment base: specify the top-level directory of a custom virtual env, or the base directory of a conda environment. If this is under /g/data or /scratch make sure you've included the appropriate directive in your storage options above.
- Conda environment: specify the name of a conda environment to activate. You must supply a conda base directory in order for this to work.
- Additional environment variables needed for your job
- jobfs size allocated to your job
- Additional PBS flags not covered by other options
- A pre-script to be run in your job before JupyterLab starts
- Click Launch button
- Initially it will show the status as Queued until your session begins to start. Once it is finished it will change to Running and look like the figure below
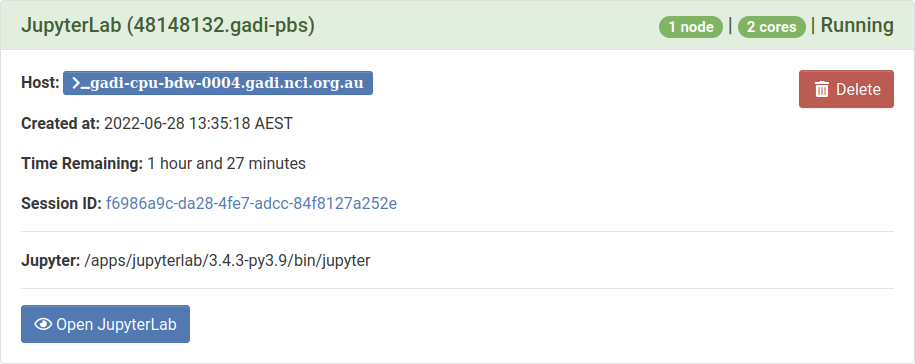
- Click the Open JupyterLab button
- This will open a new tab in your web browser that shows the JupyterLab session. NOTE: it can take a minute or two for the JupyterLab Client to start
- If you close the window the session will remain running. To end the session you can either Shutdown (last item in File menu) or delete the job on the Interactive Sessions page of ARE
...
Overview
Content Tools